Pixel Editing with Image Masking
Edit specific parts of an image at the pixel level
What is Image Masking
Image masking lets you edit only a specific part of an image without changing the rest. You paint a mask over the area you want to change, and the AI only touches that part. This is perfect for small edits like changing hair color, fixing a detail, or swapping background elements — while keeping everything else intact.
Example: Changing Hair Color
Let's say you have a comic character with blonde hair, and you want to change it to crimson red. Instead of regenerating the entire image, you can mask just the hair area and tell the AI to change only that part.
- Step 1 — Paint the mask: Select the mask tool and paint over the character's hair. Only the masked area will be edited.
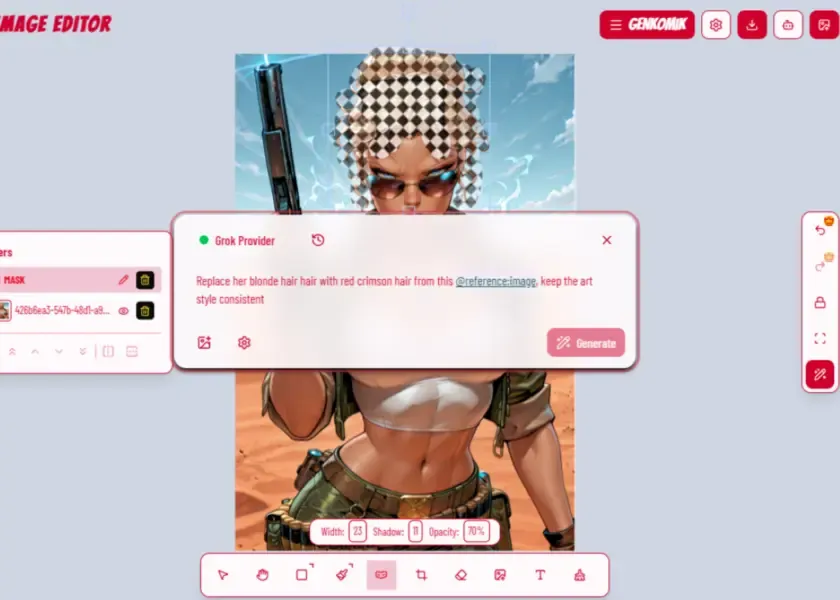
- Step 2 — Open the AI prompt: Press Ctrl+Enter or click the sparkle button to open the prompt editor.
- Step 3 — Type your prompt: Describe what you want, for example "crimson red hair" or "change hair to crimson red".
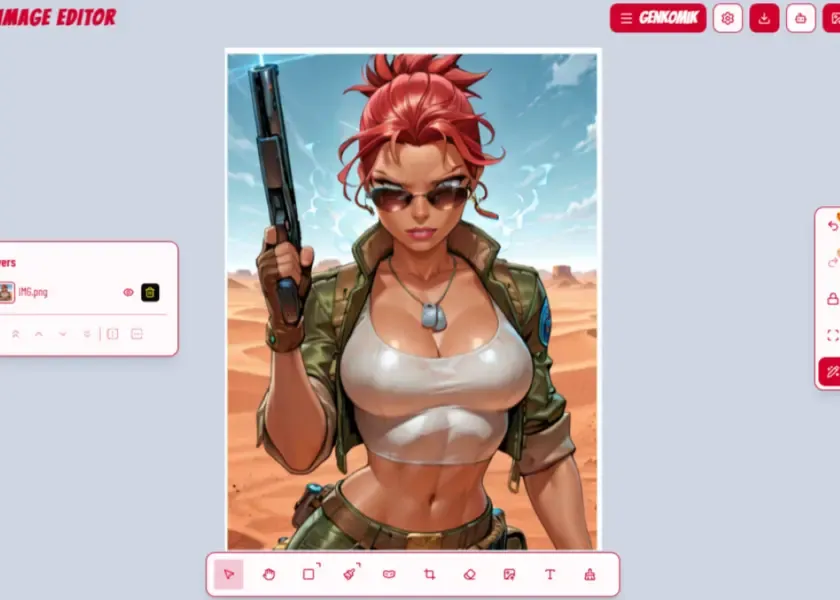
- Step 4 — Submit: The AI changes only the masked hair area to crimson red, leaving the rest of the image untouched.
Step 1: Paint the Mask
Select the mask tool from the toolbar. The toolbar will switch to mask mode. Paint over the area you want the AI to edit.
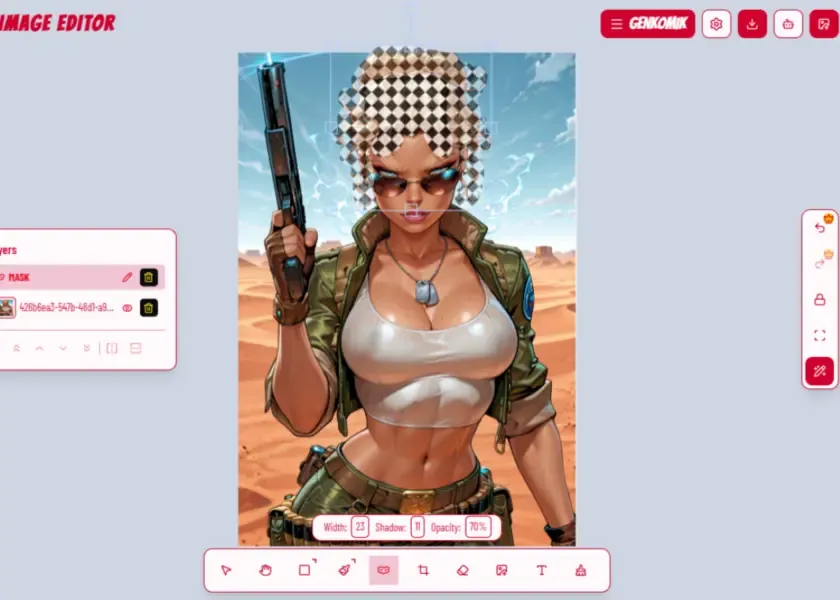
- Mask width — controls how thick your brush strokes are. Use a wider brush for large areas like hair or backgrounds. Use a thinner brush for fine details like eyes or small objects.
- Mask shadow — adds a shadow effect around the masked area so you can clearly see which parts are selected. This helps you avoid masking the wrong area.
- Mask opacity — controls how see-through the mask is. A higher opacity makes the mask more visible, but a lower opacity lets you see the original image underneath more clearly. Adjusting opacity is useful when you need to see the edges of the area you are masking — this helps the AI understand more context about the surrounding image, leading to better results.
Step 2: Open the AI Prompt
Once your mask is painted, open the AI prompt editor. The mask tells the AI which part of the image to change. Everything outside the mask stays the same.
Step 3: See the Result
After submitting your prompt, the AI changes only the masked area. The rest of the image stays exactly the same. You can undo the change if you are not happy with the result.
Mask Mode Tools
When you enter mask mode, the toolbar changes to show mask-specific tools:
- Mask tool — paint the area you want to edit.
- Brush — draw freehand strokes for the mask.
- Eraser — remove parts of the mask you painted by mistake.
- Undo / Redo — step back or forward through your mask changes.
Tips for Good Masks
- Paint carefully around the edges — the AI only changes what is under the mask.
- Use the eraser to clean up areas you masked by mistake.
- You can paint multiple separate areas if you want to edit several spots at once.
- Keep the mask tight to the area you want to change for the best results.