Civitai Integration
Connect Civitai and build your own workflows
Overview
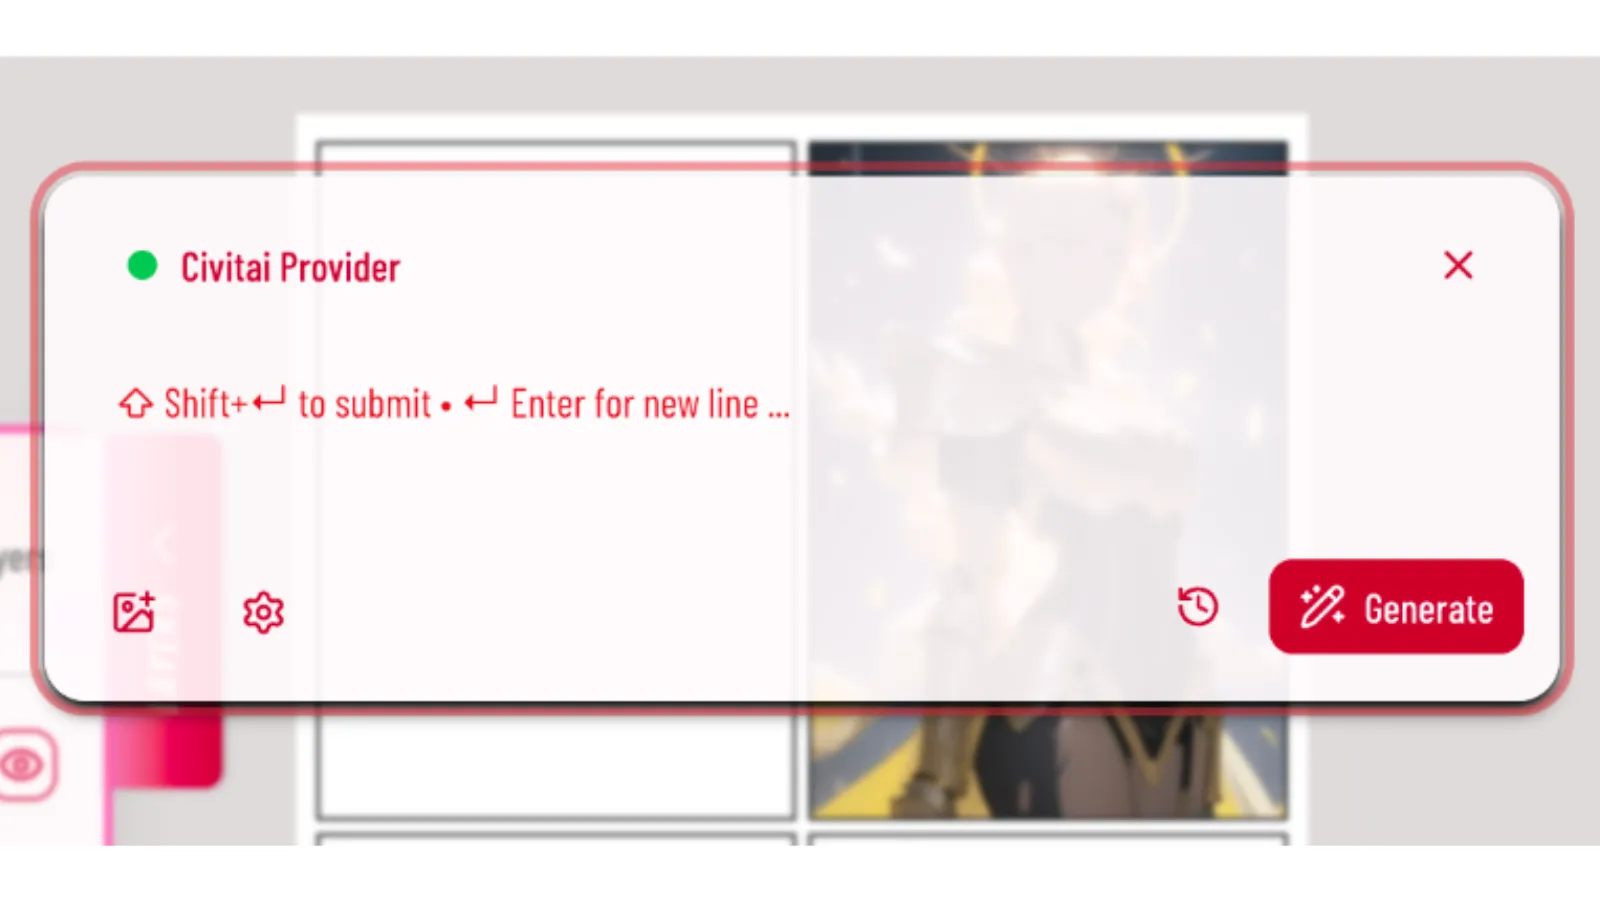
Civitai is a community where people share AI image models. By connecting Civitai to Genko Comic, you can use any checkpoint and LoRA from Civitai to generate and edit comic images. You do not need to download models or run anything on your computer. Genko handles it through Civitai.
What You Need
- A Civitai account (free to create)
- Some Buzz in your Civitai account to pay for generations
- A Genko Comic account
Step 1: Create a Civitai Account
If you already have a Civitai account, you can skip this step.
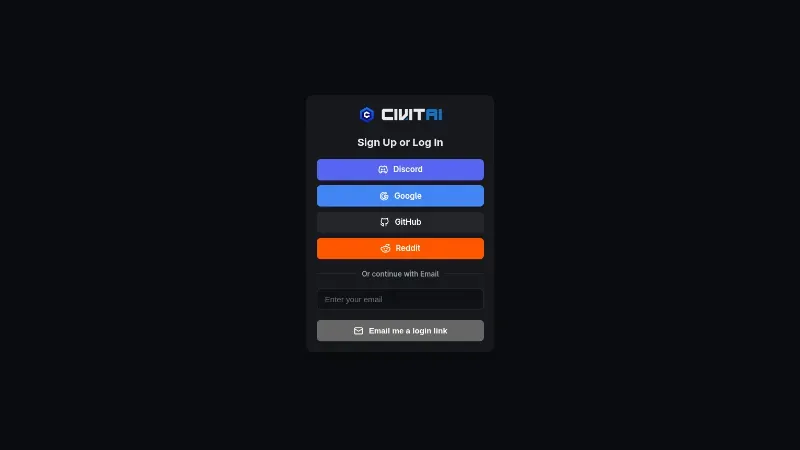
- Go to civitai.com/login and click Sign Up.
- You can sign up with your email, Google, or Discord. Pick what you prefer.
- Verify your email if asked. Then log in to Civitai.
- Check that you can see your profile picture in the top right corner. That means you are logged in.
Step 2: Connect Genko to Civitai
Genko uses OAuth to connect to Civitai. OAuth means you log in to Civitai and approve Genko, without sharing your password with Genko. It is safe and you can disconnect anytime from Civitai settings.
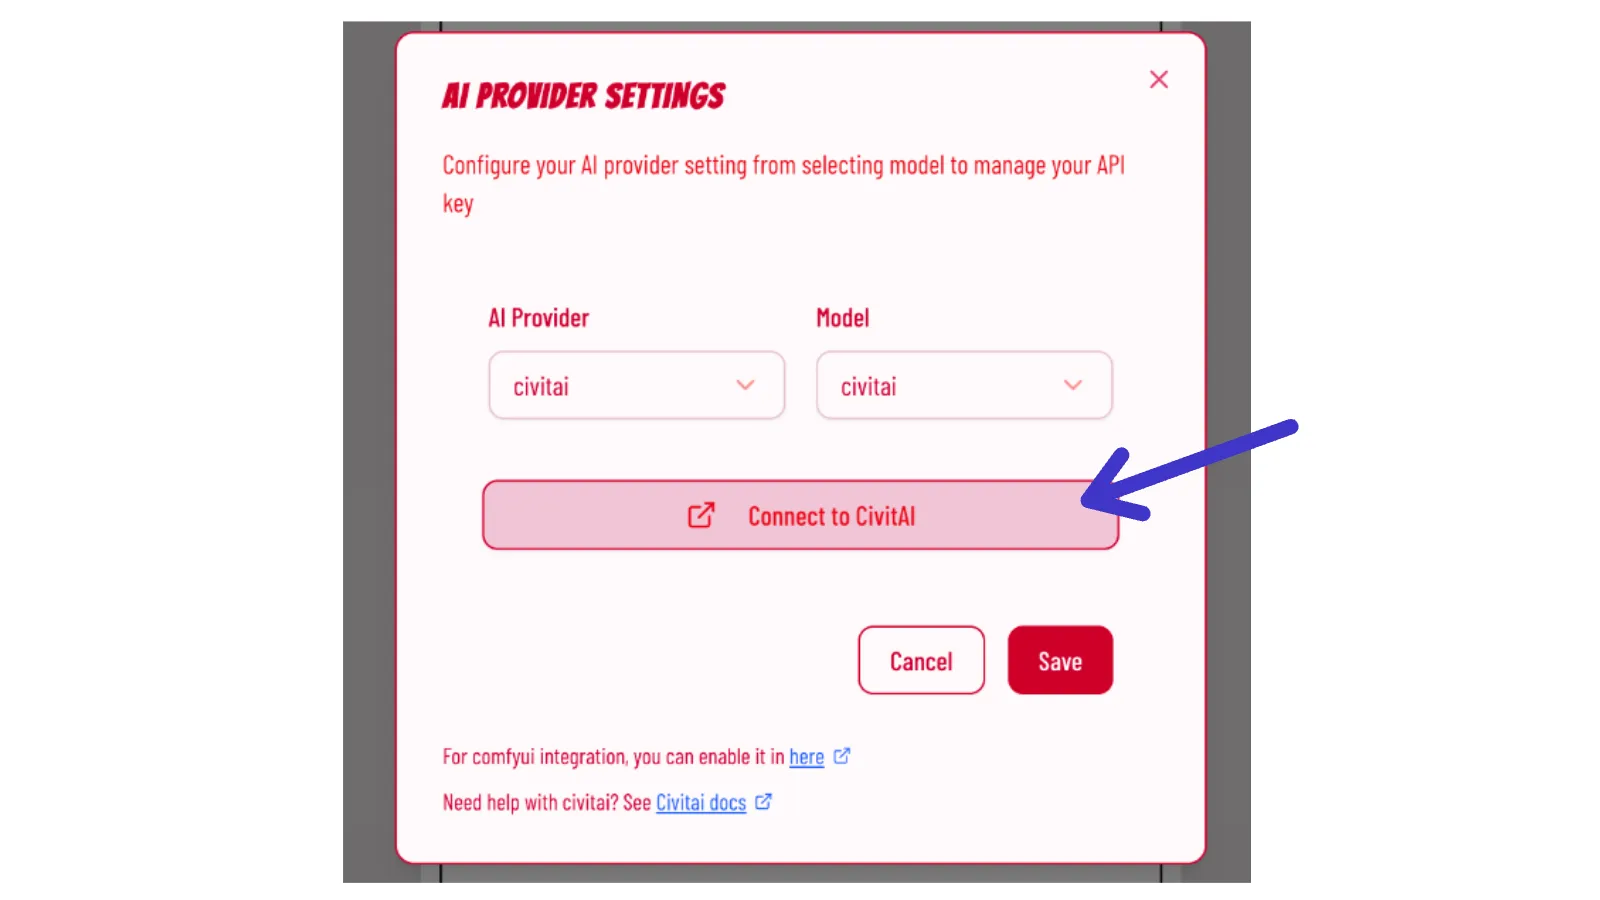
- In Genko Comic, open the AI Dashboard or go to /user/dashboard/ai.
- Find the Civitai section and click Connect to Civitai.
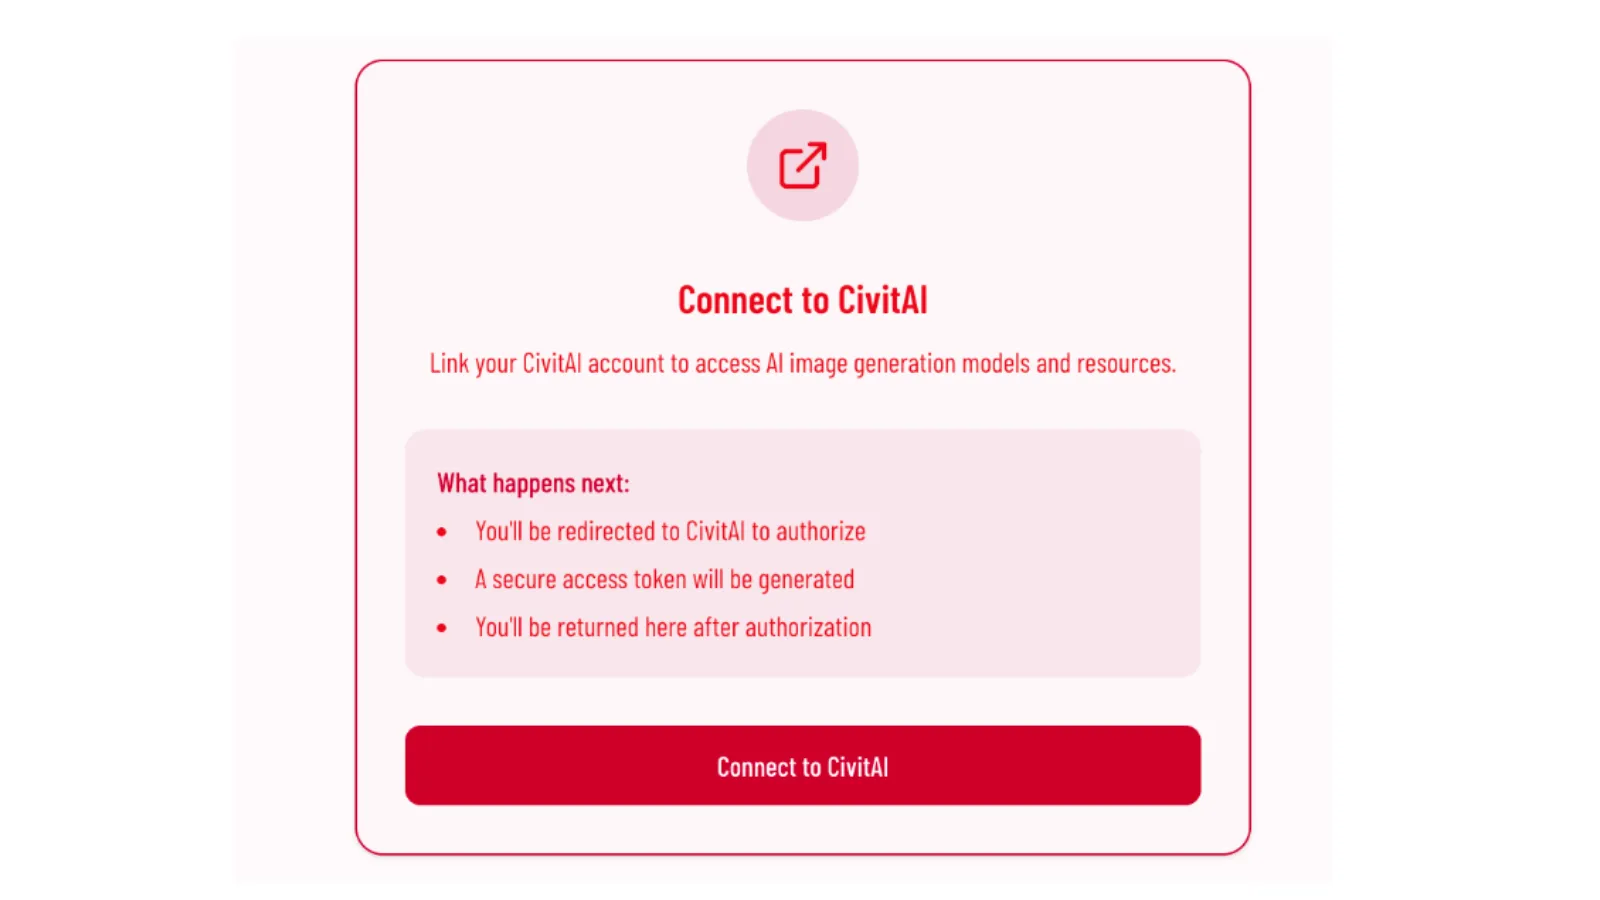
- You will be sent to Civitai to authorize. Click Authorize or Allow.
- You will be sent back to Genko. You should now see Connected to Civitai with a green check.
Step 3: How Workflows Work
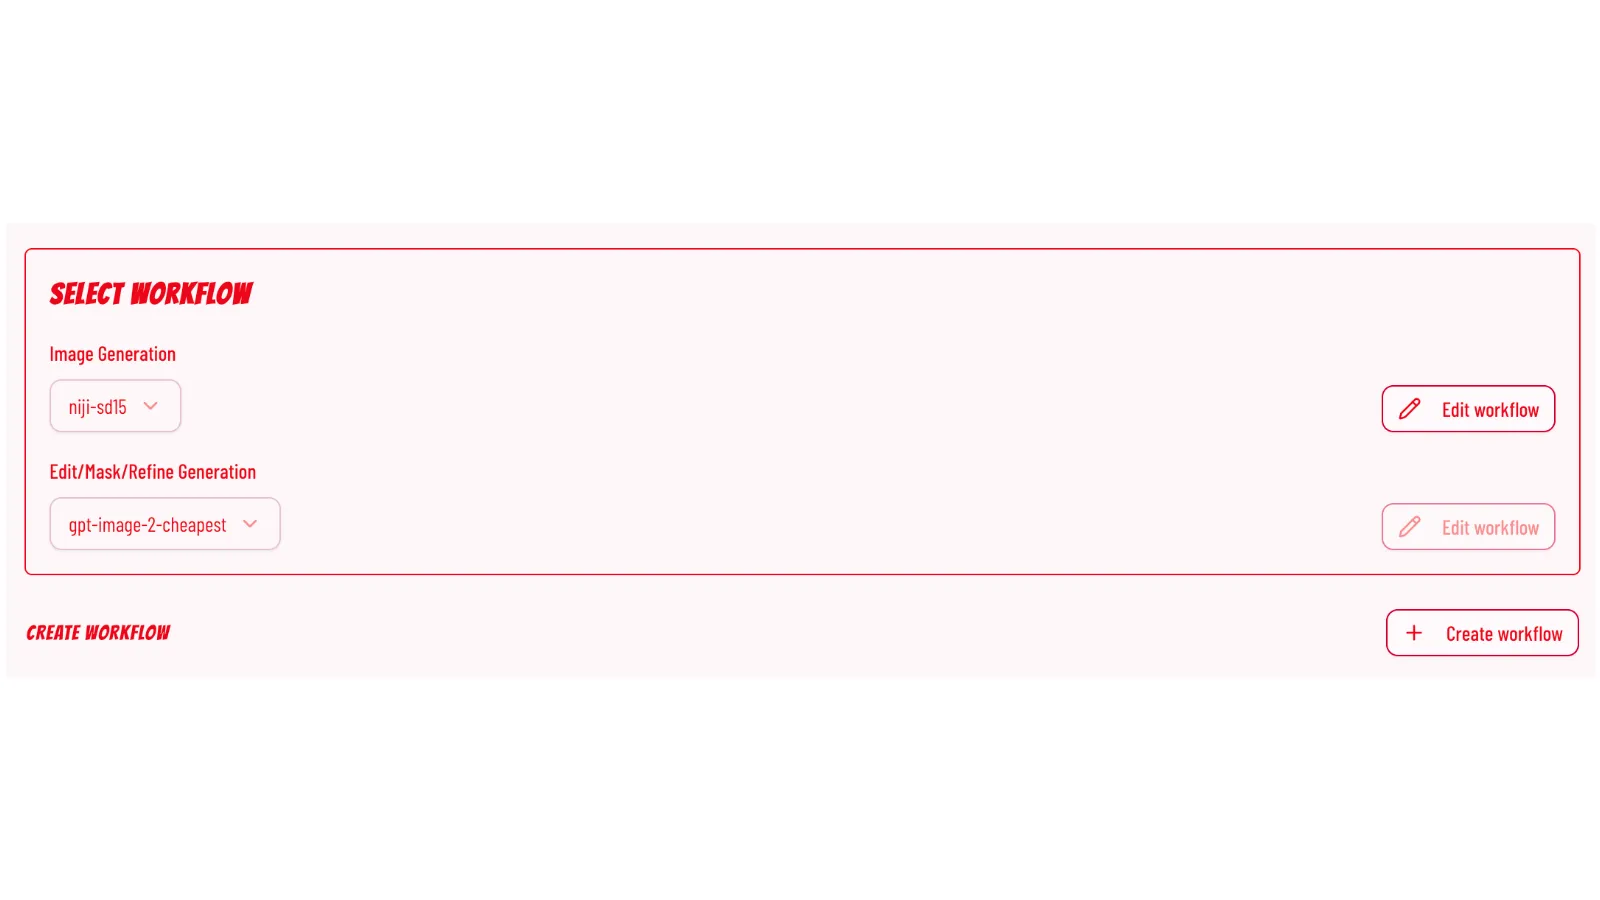
A workflow in Genko is a saved setup that tells Civitai how to make an image. You pick the model family and variant once, add your favorite checkpoint and LoRAs, and save it with a name. Then you can reuse it anytime.
Genko has two workflow lists that work the same way:
- Image Generation is for making new images from text
- Edit and Mask Generation is for editing an existing image, for example changing the style while keeping the pose
You can create as many workflows as you want for each list. For example you could have one for SD1 comic style and one for SDXL realistic style.
Step 4: Checkpoint vs LoRA - A Short Explanation
Think of these two like this:
Checkpoint - The Base Model
A checkpoint is the main model. It decides the overall look, like realistic, anime, or western comic. If you change the checkpoint, the whole image style changes. Checkpoints are large and every workflow needs one for SD1 and SDXL.
LoRA - A Small Style Add On
A LoRA is a small add on that tweaks a checkpoint. It can add a specific artist style, a costume, or a character look, without changing everything. You can add zero, one, or several LoRAs. LoRAs are optional.
A good example is using an SD1 checkpoint for western comics and adding a style LoRA on top. The checkpoint gives you the comic base, the LoRA pushes the style toward.
Step 5: What Strength Means
Genko has two different strengths and they do different things. One controls how much your source image is rewritten. The other controls how strongly a style add-on is applied. They work together but you adjust them in different places.
Checkpoint Strength — How Much to Rewrite
Only for edit workflows that use SD1 or SDXL with createVariant. It tells Civitai how much to change your source image. You set it once per workflow, near the checkpoint card.
- Range 0 to 1, step 0.05, default 0.5
- 0 — keep original almost unchanged
- 0.35 — subtle edit, keeps pose and layout
- 0.5 — balanced (Genko default)
- 0.65 – 0.7 — stronger change, more prompt influence
- 1 — full rewrite from prompt, original mostly ignored
In the creator it is labeled Strength with helper text CreateVariant strength (0 = keep original, 1 = full rewrite). Default 0.5.
LoRA Strength — How Strong the Style Is
For each LoRA you add. It controls how much that single style add-on influences the final image. You set it per LoRA inside Added LoRAs. Works in both generate and edit workflows when the variant supports LoRA.
- Range 0 to 3, step 0.1, default 1
- 0 — LoRA off, no effect
- 0.6 – 0.8 — lighter, blends with checkpoint
- 1 — full strength as trained
- 1.2 – 1.8 — exaggerated style, may overpower
- 3 — max, usually too strong except for testing
Each LoRA has its own number input. Add one LoRA at 1 first, then add a second at 0.6 if you want to mix.
createVariant. It does not show for generate workflows or for models that use editImage. LoRA strength always shows in the LoRA card when LoRA is supported.Step 6: Example - Build an SD1 Edit Workflow
Let us build a real workflow together. We will make an SD1 edit workflow that uses Arthemy Comics as the checkpoint and specific art style as the LoRA. You can copy this for any other Civitai models later.
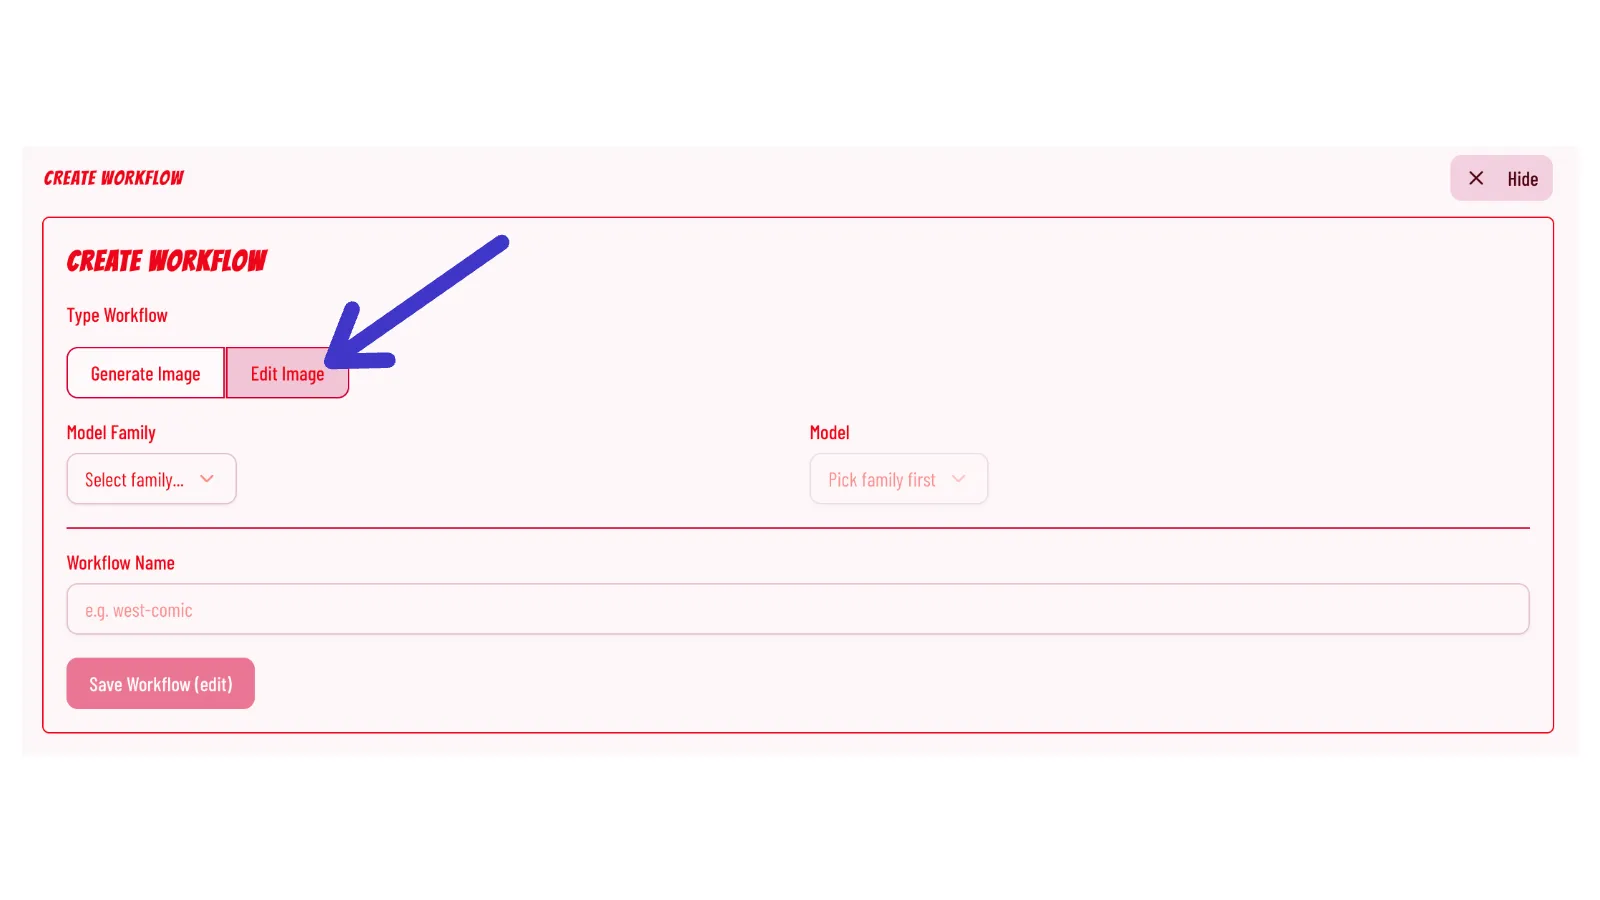
6.1 Open the Workflow Creator
- Go to the AI Dashboard in Genko.
- In the Civitai section, find Edit and Mask Generation.
- Click Create workflow or the plus button to open the creator. Make sure the mode at the top says Edit.
6.2 Pick Model Family and Variant
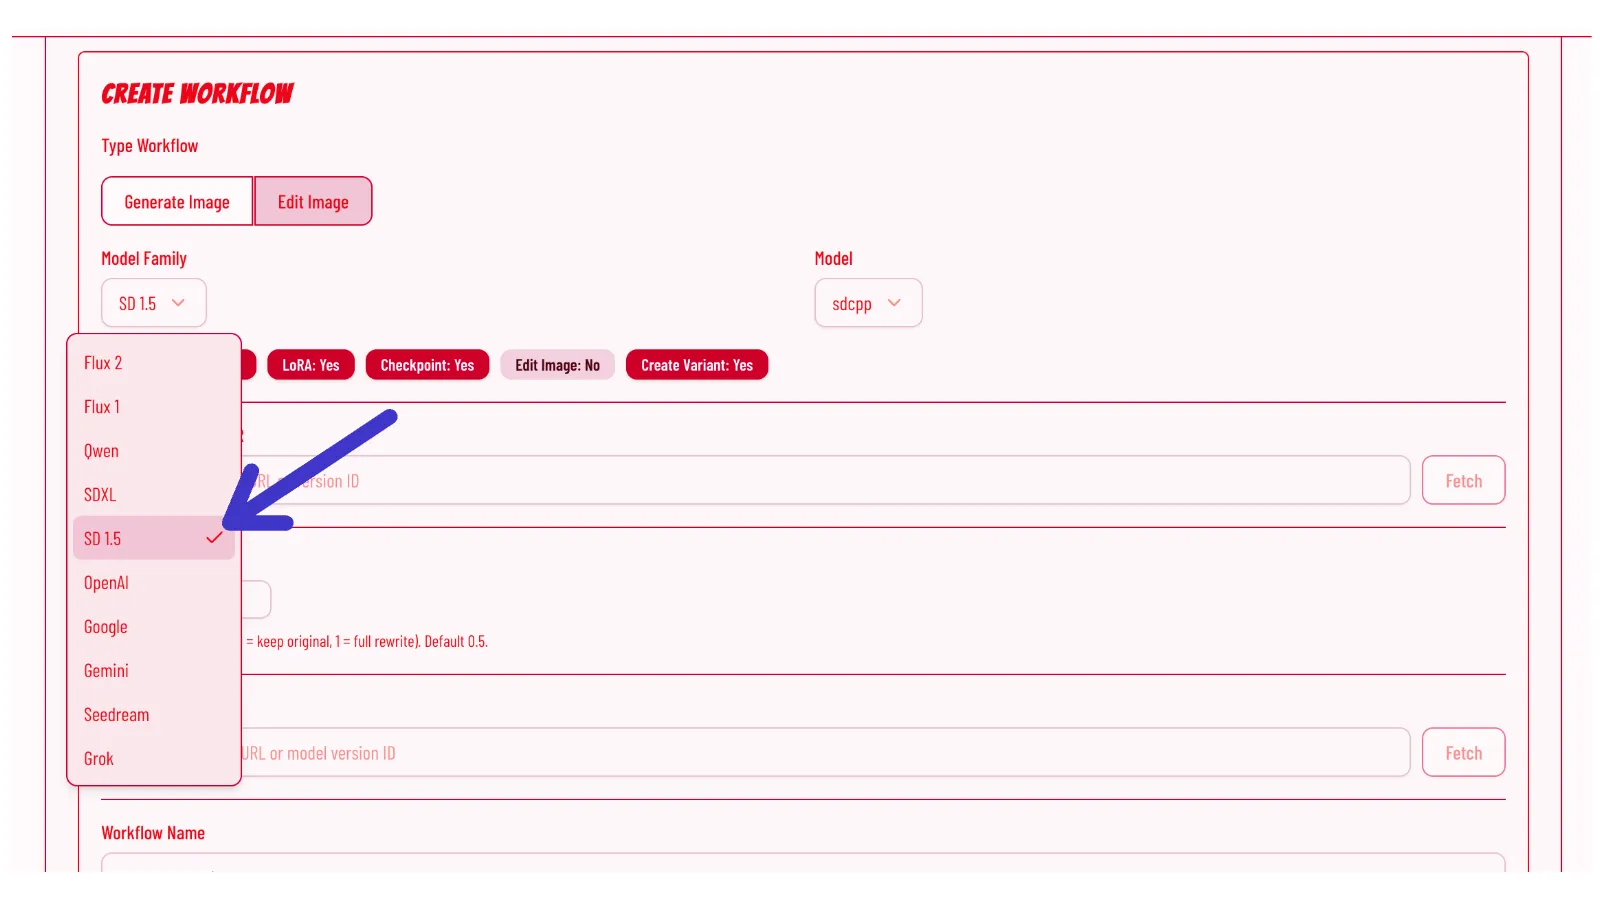
- For Model Family choose SD 1.5.
- For Model choose sdcpp.
- You will see badges that show this variant supports checkpoint and LoRA and createVariant.
6.3 Add the Checkpoint URL
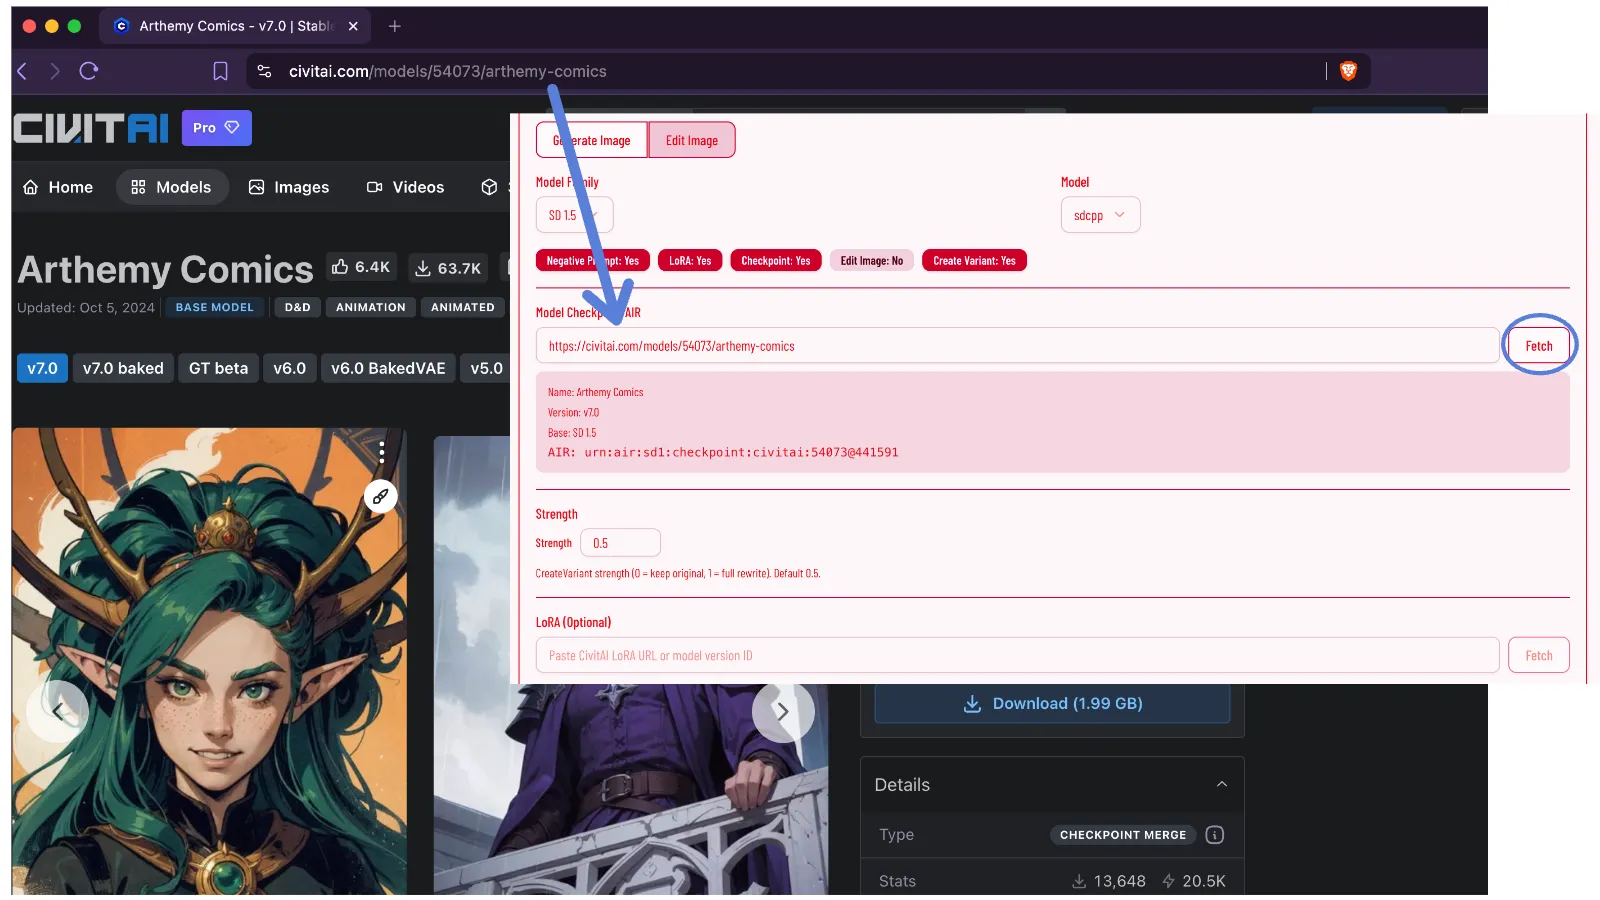
The checkpoint is required for SD1. Paste the Civitai link and let Genko fetch it.
- Find the Model Checkpoint AIR field.
- Paste this exact URL:
https://civitai.com/models/54073/arthemy-comics - Click Fetch.
- After a moment you will see a card with Name, Version, Base, and AIR. That means Genko found the model. The base should be SD 1.5.
6.4 Add the LoRA URL
Now add the style LoRA. This is optional but it makes the comic style stronger.
- Find the LoRA input field. It appears because SD1 sdcpp supports LoRA.
- Paste this exact URL:
https://civitai.com/models/180403/todd-macfarlane-comic-artist?modelVersionId=202475 - Click Add or press Enter.
- A card will appear in Added LoRAs. You will see the LoRA name and a Strength number input. Keep it at 1 for now, or try 0.8 if you want a lighter effect.
- If you see a base mismatch warning, make sure both checkpoint and LoRA are for SD 1.5.
6.5 Set Checkpoint Strength and Save
- Find the Strength field that appears for SD1 edit workflows. It is near the checkpoint card. This is checkpoint strength (0 to 1), not LoRA strength.
- Keep it at 0.5 for the first test.
- In Workflow Name type something clear like
sd1-arthemy-todd-edit. - Click Save Workflow (edit).
- The new workflow will appear in the Edit and Mask Generation dropdown. Select it.
6.6 Try It Out
Select an image in Genko, open the AI prompt editor, and write a prompt that describes your edit. Because this workflow uses createVariant, Genko will send your image plus the prompt and the strength you set. see how generate or edit your image with prompt.
Troubleshooting
- Check that the URL is correct and complete. Try copying again from Civitai.
- Some models need a modelVersionId in the URL, Keep that part.
- Try again in a few seconds. Civitai can be slow at times.
If you see base mismatch between checkpoint and LoRA, the LoRA will not look right. Use a LoRA that matches the checkpoint base. For this example both are SD 1.5, so there should be no warning.
- Checkpoint strength only shows for SD1 and SDXL edit workflows that use
createVariant. It does not show for generate workflows or for models that useeditImage. Value must be 0 to 1 in 0.05 steps. - LoRA strength shows per LoRA inside Added LoRAs whenever the variant supports LoRA (both generate and edit). Value is 0 to 3 in 0.1 steps.
Make sure you saved with the right mode. Generate workflows only show in the Image Generation dropdown. Edit workflows only show in the Edit dropdown. Our example is an edit workflow.
Next Steps
Try changing strength and LoRA strength and see how the result changes. You can create more workflows for other styles, like an SDXL realistic checkpoint or a different comic LoRA. Each workflow keeps its own checkpoint, LoRAs, and strength so you can switch quickly.